

Two of my loves come together for a trendy, fun project: Halloween and Chalkboard Art. These Chalkboard Pumpkins are easy to make and will give your Jack-O-Lanterns a run for their money. Change the sentiment to 'Thankful' or 'Blessed' and these make a great Thanksgiving table centerpiece. Gather a few supplies and let's get started making one:
1. I purchased my pumpkins at Walmart for around $5 each. They are the hard foam kind with a plastic stem. You will also need Chalkboard paint and white vinyl. I used DecoArts Chalkboard Paint and Pazzles White Vinyl.

2. Tape around your stem before painting so that you keep the stem free from paint. I used some washi tape to cover mine, but masking tape or painters tape work great.
3. Using a foam brush, paint your pumpkin. The directions on the bottle call for two coats of paint, one painted horizontal and one painted vertical. Do your best to achieve this on the rounded edges of the pumpkin.

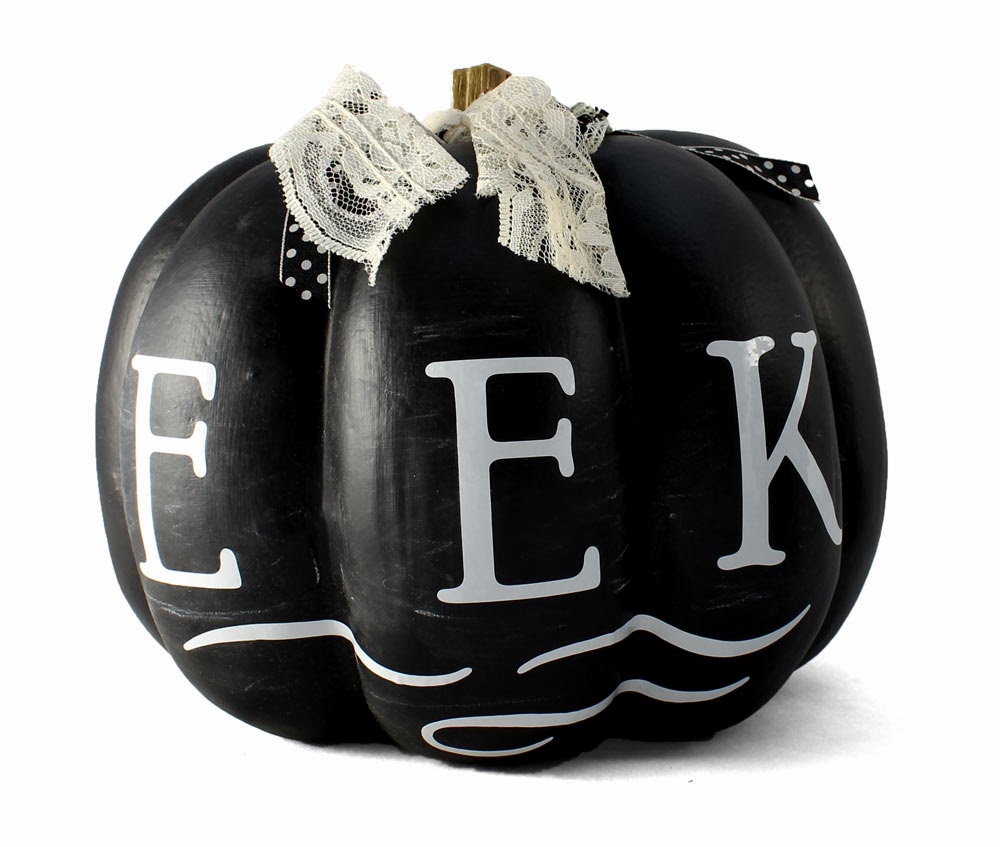
5. Finish these off with a fabulous junk bow made from scraps of ribbon and lace. I tied my ribbons around the stem, then slipped it off and placed some hot glue along the bottom of the stem before putting the bow back on. The hot glue will keep it in place.

Make your own and customize it any way you'd like. A monogram would be cool! For my next set I want to make one with our last name on it to put by the front door.
Supplies:
Foam/Plastic Pumpkins
No comments:
Post a Comment